Posts tonen met het label 3 strand braid. Alle posts tonen

vrijdag 1 mei 2020

How to: French braid with ribbon

Helpful tutorials:
3 strand braid
French braid

You'll need:
2 elastics
3 ribbons (about the length of the hair, longer is fine)

How to do this hairstyle?
  1. Comb all of the hair backwards. Lift up a top section of hair en take a small strand of hair beneath this. Put the elastic with the three ribbons attached to it around this small strand.
  2. Now take the top section again and divide it into three. Add 1 ribbon to each strand.
  3. Cross the left strand (along with the ribbon) over the middle strand and then cross the right strand (along with the ribbon) over the middle strand.
  4. Now put the ribbon from the left strand to the side for a moment. Add some hair to the left strand.
  5. Cross the left strand over the middle on.
  6. Now take the ribbon you've put aside and put it on top of the middle strand (this should be your only strand without a ribbon).
  7. Put the ribbon from the right strand to the side for a moment. Add some hair to the right strand.
  8. Cross the right strand over the middle on.
  9. Now take the ribbon you've put aside and put it on top of the middle strand (which was your only strand without a ribbon).
  10. Keep repeating steps 4 through 9 until you've added in all of the hair.
  11. Now continue a regular 3 strand braid, but make sure the ribbon always stays visible. The best way to do this is to take the ribbon from the strand you're gonna cross over and put it to the side. Then cross the strand over. Take the ribbon and add it to the middle strand. This way you can always see the ribbon.
  12. When you've reached the end of the hair, finish off with an elastic. If you have leftover ribbon, you can either tie it into a bow or simply cut it off.
Good luck!


zondag 16 februari 2020

How to: Yelena's hairstyle from Frozen 2

Helpful tutorials:
3 strand braid

You'll need:
9 small elastics (or 18, if you're using double elastics)

How to do this hairstyle?
  1. Part the hair off centre, about in the middle of the eyebrow.
  2. Create a second part on the other side of the centre, also about in the middle of the eyebrow.
  3. Now create a third part from the left to the right part, about 5 centimeters away from the forehead. This is the hair for your first ponytail.
  4. Put an elastic around this ponytail. In the movie, Yelena has white hair and uses dark elastics - because I have dark hair, I've used white elastics.
  5. Now create on each side of this ponytail three smaller ponytails. Try to make nice and straight parts every time. Tip: start the part at the top and then go down (starting at the middle ponytail you have) before going to the front.
  6. Once you've created all seven ponytails, comb the hair from these ponytails back and put an elastic around them.
  7. Lastly, take a strand of hair on the left side of the head. The strand starts at the back of the neck.
  8. Divide the hair from this strand into three and do a regular 3 strand braid. Finish off with an elastic. Be careful: Yelena wears this braid to the front, so make sure your braid stays there.
Good luck!
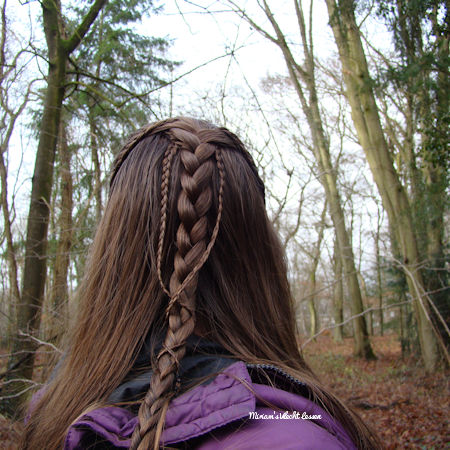


zaterdag 2 november 2019

How to: Box fishtail headband braid with braided bun

Helpful tutorials:
Dutch 3D splitbraid (the technique is similair)
3 strand braid

You'll need:
2 small elastics
2 or 3 bigger elastics
Bobby pins
If desired, a flower or bow hair clip

How to do this hairstyle?

  1. Part the hair just off center. Create a second part starting at the first part and going down to the ear, so you have a section of hair at the front of the head. Make sure to have this section on the side with the most hair.
  2. Comb the rest of the hair backwards and tie it into a ponytail.
  3. Now take a small strand of hair close to the part and divide this strand into two: a left strand (far away from the forehead) and a right strand (close to the forehead).
  4. Take a small strand of hair from the left strand and divide it into two. Cross half over the left strand and cross half under the left strand. Then add both strands to the right strand.
  5. Take a small strand of hair from the right strand and divide it into two. Cross half over the right strand and cross half under the right strand. Then add both strands to the left strand.
  6. Repeat step 4.
  7. Take some hair on the left side of the left strand, cross it under the left strand and add it to the right strand.
  8. Repeat step 5.
  9. Take some hair on the right side of the right strand, cross it under the right strand and add it to the left strand.
  10. Repeat steps 6 through 9 until you've added in all of the hair.
  11. Then repeat step 4 and 5 until you've gone past the ear and finish off with a small elastic.
  12. Add the braid to the ponytail. You can do this by using another elastic or by lifting up the old ponytail elastic a little bit and pulling the end of the braid through.
  13. Divide the hair from the ponytail (so including the end of the braid) into three and do a regular braid with this hair. Finish off with a small elastic.
  14. Twist the braid around the ponytail elastic, so you'll get a bun. Put another elastic around the bun and use bobby pins to keep the bun in place.
  15. If you like, you can hide the elastic from the braid with a flower or bow.
Good luck!


zondag 6 oktober 2019

Autumn braids

With the weather changing from sunny to rainy and windy (here in the Netherlands at least) I always start thinking about autumn. For me, autumn is the leaves changing colors and of course Halloween at the end of the month. So why not add that to your braids?

Since Halloween is something different, I won't mention it anymore in this article. Instead, I would like to give you some ideas to add an autumn vibe to your hair.

The first and simplest idea is to add some decoration:

An autumn leave is a fun decoration in your hairstyle! I've done a double waterfall braid here and then added a Dutch braid on each side with the strands from the waterfall braid. I finished off the style with a regular 3 strand braid.


An autumn leave is definitely easy and fun, but it probably won't stay in during a long or active day. A bow is a great alternative:

This pumpkin bow has autumn feeling written all over it! I've done a waterfall braid and then added the waterfall strands to a ladder braid. I then took all of the hair together, tied it into a ponytail and braided that ponytail with a 3 strand braid. I then turned the braid into a bun and added the bow.

Another fun way to add an autumn feeling to your braids is adding ribbon. Orange is usually a real autumn color, but red and yellow can work as well. The fun thing about ribbon braids is that you can use as many or as little strands in your braid as you like: a 3 strand braid can already be turned into a ribbon braid by replacing one of the strands with a ribbon. Add 1 ribbon or 2... the possibilities are almost endless!

Autumn ribbon colors in these flower braids! I've done three 4 strand braids with a single ribbon and then turned them into flowers.

I hope you have some ideas how to give your hairstyles a little extra autumn feeling. If not, here's a few more ideas!

A 6 strand braid with 3 ribbons, one of the ribbons being orange. For me, this hairstyle isn't even that much about autumn, but the background really gives me that feeling.
(Note: the YouTube video link is a 6 strand braid with micro braids, but just replace the micro braids with ribbons for this hairstyle)

If one piece of decoration isn't enough, then why not add two? I've used my pumpkin bow on top of the ponytail, that is an intricate 5 strand braid. I've used three regular strands and two braided sections: each braided section is a 3 strand braid with one of the strands being an orange ribbon.

This background just screams autumn (apart from the parked cars of course! :P). The hairstyle is a 5 strand Dutch ribbon braid. I've stopped adding in hair when I was at the ears, but I did continue the 5 strand ribbon braid all the way down. With the leftover hair, I've done two 3 strand pancaked braids. At the end, I tied all of the braids together with an elastic.


zaterdag 9 februari 2019

How to: Ladder braid with 3D split braid

Helpful tutorials:
Waterfall braid
3 strand braid
3D split braid

You'll need:
1 big elastic
1 small elastic
2 temporary elastic
Topsy tail

How to do this hairstyle?
  1. Part the hair just off center.
  2. Take a small strand of hair from the side with the most hair and divide it into three. Do a waterfall braid with this hair.
  3. When you've braided until just behind the ear, stop doing a waterfall braid. Continue a little further as a regular braid and then finish off with a temporary elastic.
  4. Now take a new section of hair below the waterfall braid. Divide this section into two - left and right.
  5. Take your first waterfall strand and cross it over strand Left from step 4. You now have three strands to braid with again.
  6. Cross strand Right from step 4 over the middle strand.
  7. Add the next waterfall strand to the left strand of your braid and cross them together over the middle strand of the braid.
  8. Add some hair to the right strand of your braid (be careful not to take any waterfall strands!) and cross the strand over the middle on.
  9. Repeat steps 7 and 8 until you've added in all of the waterfall strands. Try to keep your braid close to the waterfall braid, so it will look like the two braids are actually 1 big braid.
  10. When you've added in all of the waterfall strands, braid a little further without adding in hair. Finish off with a temporary elastic.
  11. Take all of the hair together, including the braids, and put an elastic around it. You can now remove the temporary elastics from your braids.
  12. Take your topsy tail and put it just behind the elastic. Take a small strand of hair from your ponytail, wrap it twice or three times around the elastic and then put the end through the eye of the topsy tail. Pull the topsy tail down.
  13. Divide the hair from your ponytail into three strands and do a 3D split braid: before crossing a strand over, split it into two and cross the top part over the middle strand and the bottom part under.
  14. Continue until the end of the hair and finish off with an elastic.
Good luck!


zaterdag 11 augustus 2018

Travel braids

The summer months are always ideal months to travel. Travelling means a lot of planning, though: where are you going to go, how are you going to get there, where are you going to sleep, what are you going to bring, but most importantly (at least for me!) - how are you going to wear your hair?

For me, there's two kinds of travel braids:

  • the braid you want to wear because you're going to go some place nice and you're hoping for a beautiful photo;
  • the braid you want to wear because you've got a long day of travelling and you still want to look presentable when you arrive.

My vacations usually have both braids: the second braid for the flights to and from the destination and the first braid for the other days. I do always plan the first braids as I don't want to waste my time on the destination thinking about what kind of braid I want to do. If I have to think about it once I'm there, I usually end up doing a braid I've done a million times before and I just don't want to do that when I've got a chance of a special background. This 4 strand slide up braid made out of braids, for example, is a braid I had planned before we went on vacation and one I could never have thought of in the morning. It's actually really easy (you create 4 braids, you make a 4 strand braid out of those 4 braids and then you slide it up), but yet I love how intricate it looks.

For the second type of braids (the 'have to stay in all day' braids) I usually go to simple styles. That way you can easily do the braid again if it doesn't look the way you want anymore. Great styles would be a side ponytail with a rope braid or a 4 strand braid. I never go for a ponytail in the back as I find it's not comfortable when you want to lean back in your seat. That's why I never wear buns either when I have to travel a long time.
Other great styles would be two French or Dutch braids or, if you've got more time in the morning before you travel, a fishtail braid. I love fishtail braids for travelling for my hair as I tend to have quite a bit of flyaways and I find them staying in better with a fishtail braid.

Travel photo from 2016: the fishtail braid on the left was for a long day in the car and the French fishtail braid on the right was for the flight from Los Angeles to Amsterdam.

Another great travel braid is a pull through braid. The elastics help to keep the braid in all day, better than a regular braid. For my recent flight from Amsterdam to Vancouver I did this side pull through braid and when I arrived in Vancouver I did of course have some flyaways, but it still looked nice.


Of course now I'm curious if you have any favorite travel braids. What kind of braids do you usually do during your vacation? Easy styles because you want to have time to enjoy your day? Or new braids as you've got time to try them out now? And what are your favorite braids for long flights / car rides? I'd love to hear from you, so please leave a reply below this post or on Facebook!


zaterdag 24 maart 2018

Headband braids inspiration

Headband braids are great hairstyles on school mornings as they are quick and often easy - a French braid, a Dutch braid or a lace braid. A twist braided headband is also a great idea and for those of you with longer hair, a simple 3 strand braid wrapped around the head (photo below) is perfect as well.

But why not try using a different technique for your headband braids? I have a tutorial on the 5 strand headband braid and you could also use ribbons in your headband braid. A little while I tried out a completely different technique - a 4 strand fishtail headband braid. I really love how this headband braid turned out as it's so different from any other headband braid and it doesn't even take that long (once you've mastered the 4 strand fishtail of course). If you'd like to practice the 4 strand fishtail braid first of all, there's a tutorial on my YouTube channel Miriam's Vlecht Lessen.

Simple 3 strand headband braid for longer hair


4 strand fishtail headband braid


Good luck trying out different techniques! I'd love to know which techniques you've tried - please leave a comment below telling me which technique you've used!


zondag 28 januari 2018

How to: Simple and fancy bun


How to: Simple and fancy bun

Helpful tutorials:
3 strand braid tutorial
Twist (rope braid) tutorial

You'll need:
One big elastic
4 small elastics
Bobbypins
A flower or a bow if desired

How to do this hairstyle?
  1. Start off with a ponytail with all of the hair.
  2. Divide the hair into 4 parts: 2 parts with a little more hair and 2 parts with a little less hair.
  3. Use the 2 parts with a little more braid to create 2 regular braids. Finish off with a small elastic.
  4. Use the 2 parts with a little less hair to create 2 twist braids. Finish off with a small elastic.
  5. Twist the braids and twists around the big elastic and pin them into place with bobbypins. Try not to twist the braids and twists too tight around the elastic.
  6. If you like, you can give the bun a little color by using a flower clip or a small bow.
Good luck!

Tip: of course this bun can be done with all kinds of braiding techniques!

maandag 10 april 2017

4 strand waterfall braid

When you've mastered the regular waterfall braid and when you've leaned the 4 strand braid, then this 4 strand waterfall braid is easy for you. It's a super fun braid, that's easy and beautiful. Tip: make sure you're always going under on the side closest to the part line, this gives the best result.

The technique:
4 strand waterfall braid tutorial

Ideas:


A 4 strand waterfall braid on the right side, combined with a French braid on the left side.

Two 4 strand waterfall braids

Again two 4 strand waterfall braids, finished off with a bubble braid

A double 4 strand waterfall braid

A 4 strand waterfall braid, combined with a braid that's a combination of a regular braid and a fishtail braid

Two 4 strand waterfall braids, finished off as a flower, with a mermaid braid below.


maandag 30 januari 2017

3 strand braid

The 3 strand braid is the base of all braided hairstyles. The left strand over the middle one, the right strand over the middle one and repeat this until the end. Or - as alternative - the left strand under the middle one and the right strand under the middle one.
This is a technique you absolutely must master before trying other braiding techniques. And is this technique all you can manage to do? No worries, even with just a 3 strand braid you can create enough fun and beautiful hairstyles!

The technique:
3 strand braid tutorial


Ideas:


Bundled braids, which means: create a ponytail, do six 3 strand braids (or more or fewer) and fold them up!

A regular 3 strand braid with one of the strands being a small 3 strand braid.

A braided bun: create a ponytail, create three 3 strand braids in that ponytail and pin them into place with bobby pins.

A 3 strand braid with two micro 3 strand braids crossed around it.

Four crossed 3 strand braids, pulled through a twist (rope braid).

Create a knot out of two strands of hair and create a 3 strand braid in each strand. Use bobby pins to secure the knot. Here a fishtail has been done first.

Started as four 3 strand braids, crossed and combined into two. Below a bubble ponytail has been done.


maandag 23 januari 2017

Slide up braid

A slide up braid is a fun and easy way to make a regular braid really special. The technique means you're holding 1 of the strands, after doing a regular braid, and slide the rest of the braid up. That way you'll get a very unique braid that'll make everyone go: "Wow, how did you do that?", while it's actually really easy.
The slide up braid is fun to do with a 3 strand braid, a 4 strand braid or a 6 strand braid. A variation in a 4 or 6 strand braid would be to use a ribbon or microbraid as one of the strand and to hold that strand. This will give you an even more fun result!

The technique:
Slide up braid tutorial (3 and 4 strand)
6 strand slide up braid with ribbon tutorial
Ribbon slide up braid tutorial

Ideas:

3 strands:


A regular slide up braid combined with a regular braid

Instead of 1 accent braid you can also use 2 slide up braids as accent! Combined with a fishtail braid.

The slide up braid is also fun as a flower. For more on this, watch my tutorial!

A super fun variation: 2 ribbons and 1 strand of hair. Hold on to the strand of hair and slide the ribbons up for this fun effect! Combined with a fishtail.

4 strands:

Three slide up braids with 4 strands as accent with a messy bun

The slide up braid is also fun as part of a stacked braid!

The 4 strand slide up braid with ribbon, done with big strands of hair. This creates (without doing anything extra) the fun twist effect!

6 strands:

The 6 strand slide up braid with ribbon (as explained in my tutorial) is always a special accent!


maandag 12 december 2016

5 strand ribbon braid

If the 5 strand braid with 2 ribbons is easier or more difficult than the regular 5 strand braid is something people can differ about. Personally, I think the 5 strand ribbon braid is easier as you can see more clearly which strands you're braiding with. The 5 strand ribbon braid is also a favorite of mine as a ribbon makes such a huge difference in a hairstyle. You can choose to take 2 ribbons of the same color (this will make the braid look more complicated than it really is) or you could take 2 different colors, giving you all kinds of combination possibilities. You could choose colors that go with a season (red + green for Christmas) or choose the colors of your favorite sports team!

The technique:
5 strand ribbon braid tutorial


Ideas:


The 5 strand ribbon braid as explained in my tutorial, only done on the side of the head. Ribbon colors: yellow and black for my favorite sports team (corfball).

Do a 5 strand ribbon braid as explained in the tutorial, but stop adding in hair when you've reached the ear. Then braid until the end of the hair without adding in hair. Use the hair you have left to do two regular braids and pancake these.

Do the 5 strand ribbon braid as headband braid! More details: How to: a 5 strand ribbon braid with accent

Start the 5 strand ribbon braid by adding in hair only on the left side, as a lace braid. Switch after adding in hair on the left about 8/9 times to the right side and add in hair 3 times. Then continue braiding without adding in hair.

Only add hair to your 5 strand ribbon braid on the left side, like a lace braid. Split the bottom strand into two every time and drop half of the strand. This creates a sort of waterfall braid.

Fun for carnaval / crazy hair day: 4 ponytails with 5 strand ribbon braids!


vrijdag 9 december 2016

Pull through braid

The pull through braid is a braid made out of two (or more) ponytails. Every stitch is made out of one ponytail being pulled through the other. This creates a braid similar to a 3 strand braid, only slightly different. A big advantage of this braid is that it's a hairstyle with a lot of elastics, which gives you a braid that stays in really well. That's also the disadvantage as taking out all of the elastics isn't always easy!

The technique:
Pull through braid tutorial
Reversed pull through braid tutorial
Pull through braid with microbraids braid tutorial

Ideas:


The pull through braid as explained in my tutorial

The pull through braid with microbraids as explained in my tutorial

An easy variation: start with a ponytail and then do a few stitches of pull through braid with a small part of the hair!

Another easy variation: finish off the style after a few stitches of pull through braid with a ponytail!

The pull through braid is also fun as part of a stacked braid. First bring part of the hair to the side. Then do a pull through braid with the rest of the hair, pancaking it a lot. Then do a braid with your first section of hair and use bobbypins to pin it on top of the pull through braid.

Why start on top of the head with your pull through braid? Start for a change at the bottom and finish off with a braided bun, made out of a regular 3 strand braid!