Posts tonen met het label basic technique. Alle posts tonen

dinsdag 27 oktober 2015

Basic techniques - level 4 and further


Basic techniques - level 4 and further

Those who have mastered the level 1, 2 and 3 basic techniques, will be able to create loads of different hairstyles already. If you wish to challenge yourself even further, then try to master these last basic techniques:

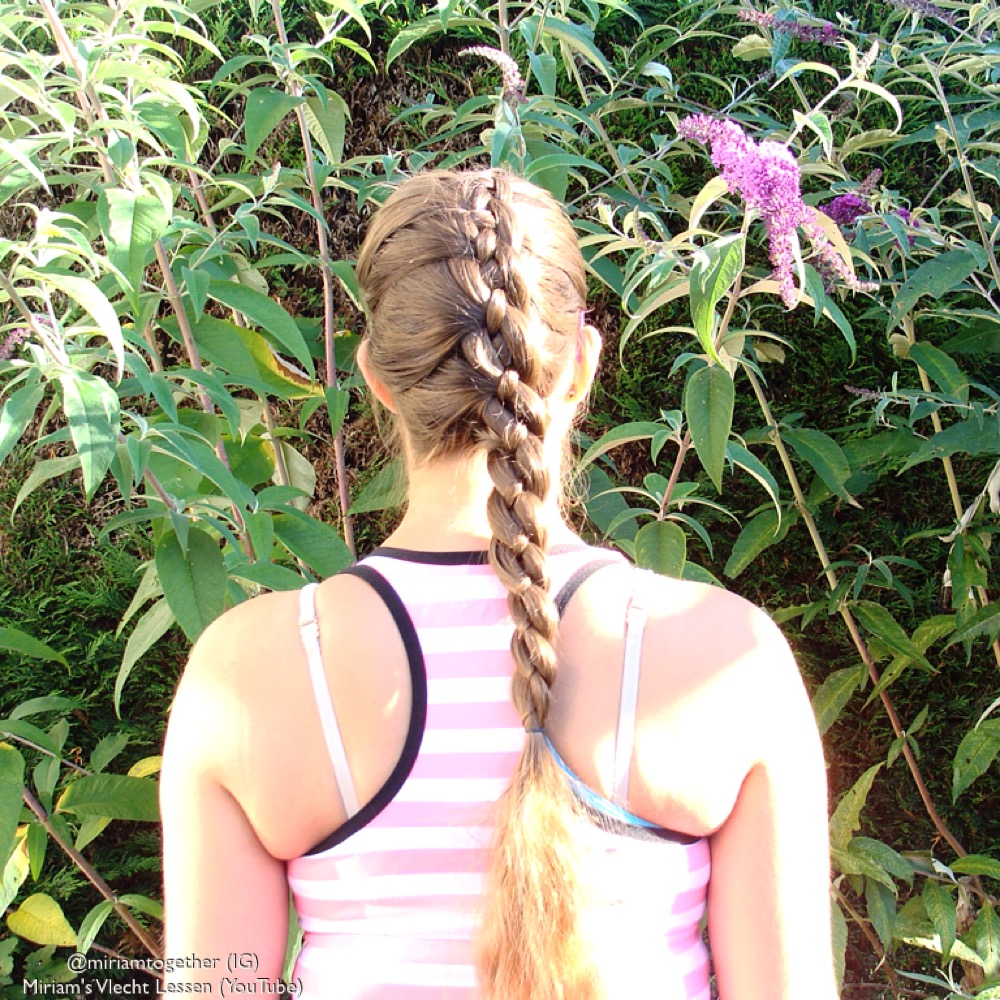
  • Dutch / French braiding with 5 strands: the 5 strand Dutch braid is one of my favorite braids. A beautiful big braid that's actually quite easy as you can hold your two left strands and your two right strands together every time.
  • 4 strand waterfall braid: again one of my favorite braids. Again not very difficult, as you only need to master a 4 strand braid for this. For the best result I advise to start with under-over, so crossing the strand closest to the part under first of all.
  • 4 strand Dutch braid: a regular 4 strand braid turns into a French/Dutch braid when you're adding in hair. By adding in hair a little different, you'll have a completely Dutch braid. This is how it works: start with a regular braid stitch - under-over; over-under. Now add hair to the left strand and cross it under-over. Now take your right strand and cross it over the strand next to it (for now I'll call this strand X). Now add hair to the right strand, but cross this hair under strand X first before adding it to the right strand. Now cross the right strand with the hair added to it under the strand next to it. Keep repeating this until you have no more hair to add.
  • French (Dutch) 3D braid: the 3D round braid is very beautiful too when you're adding in hair. This is the same as for a regular French / Dutch braid: add in hair and then cross the strand under the two strands next to it and twist it around the second strand.

When you've mastered all of these techniques, there's of course even more difficult braids to try. These more difficult braids often have more strands (6, 7, 8 or even 9) or one or more ribbons. For the advanced braiders, I'll share the link to my tutorial on the 6 strand braid and the 6 strand slide up braid with ribbon, but if you've mastered all the techniques I've explained, you can call yourself a real braiding champion!

dinsdag 13 oktober 2015

Basic techniques - level 3

Those who have mastered the level 1 and level 2 basic techniques, can try even more difficult braiding techniques. In this article I'll explain the next step: the level 3 basic techniques.

  • Dutch waterfall braid: a variation on the waterfall braid. Instead of crossing the strands over, like in a French braid, you'll cross the strands under. The only thing you need to keep in mind, is that you have to drop the middle strand every time and put the replacing strand in the middle before braiding further.
  • 5 strand braid: one of my favorite braids. Braiding with 5 strands might seem difficult, but the advantage is that you can hold your two left strands and your two right strands together. This makes it seem like you only have three strands. You're also working with only three strands every time: your far left strands is going over-under (or under-over) and then your far right strand is going over-under (or under-over). One strand doesn't cross all other four strands.
  • French/Dutch 4 strand braid: if you've mastered the regular 4 strand braid, you can try adding in hair. Because the 4 strand braid is going over-under, under-over (or under-over, over-under), you'll have half a French braid and half a Dutch braid.
  • 4 strand ribbon braid: instead of braiding with 4 strands of hair, you're braiding with 3 strands of hair and one ribbon. Personally I think this braid is easier than the regular 4 strand braid, because the ribbon makes it easier to tell the strands apart and to see where you are in your braiding process.
  • Round 3D braid: divide the hair into 4 strands. Cross the far left strand under two strands and twist it around the last strand. Then cross the far right strand under two strands and twist it around the last strand. Keep repeating this and you'll get a beautiful round braid.
  • Mermaid braid: a mermaid braid is like a regular French braid, only now you take strands to add in from the far front / side. Watch the tutorial for more details!
Good luck again practicing these techniques! If you've mastered all of these as well, you can start preparing for the final level of basic braiding techniques. I'll explain these in another article.

dinsdag 6 oktober 2015

Pancaking

Photo 1: a 'regular' Dutch braid

Photo 2: a Dutch braid that has been pancaked

Pancaking

The title of this article might seem as little strange, but pancaking is a word that's being used often in the braiding world. It has nothing to do with pancakes, though, but everything with making a braid bigger.

When you're pancaking, you're pulling on the edges of the braided stitches. That way you kinda pull the braid apart, which makes it look bigger. Compare the two photos: in both photos I've done a single Dutch braid, but in the second photo I've pancaked the braid. This makes the braid look bigger.

Tip: do you want to make a really big braid? Then start pancaking while you braid. Braid a few stitches, pancake, braid another few stitches, pancake, and so on. If you wait until you've finished your entire braid before you start pancaking, you'll find that it's much harder to make the braid a lot bigger.


maandag 5 oktober 2015

Basic techniques - level 2

This hairstyle was made using level 1 & 2 techniques: the waterfall twist and a lace braid.


Basic techniques - level 2

In an earlier post I described the level 1 basic techniques, the beginners braids: techniques you should master before trying to create more complicated hairstyles and braid creations.

Today I'll explain what I call the level 2 basic techniques:

  • Waterfall twist: this is the easiest version of all waterfall braids. You only have two strands and the only thing you do, is twisting the strands with a strand in between every time. Check out the tutorial for a more detailled explanation.
  • Waterfall braid: if you've mastered French braiding, you can also do a waterfall braid. This braid looks a lot like French braiding, the only difference is that you drop your strand on one side each time and replace it with a new strand.
  • French fishtail / Dutch fishtail: those who have mastered the regular fishtail braid, can try adding in hair. If you cross the strands over, it's a French fishtail; if you cross the strands under, it's a Dutch fishtail. Tip: use small strands, also when you're adding in hair!
  • 4 strand braid: under-over, over-under... This is the only thing you should constantly repeat when doing a 4 strand braid. Once you've got this, you'll see this isn't a difficult braid at all!
  • Slide up braids: these are braids that will always give a fun result and usually a lot of compliments. Personally I love the 4 strand slide up braid most, but for those who are still practicing the 4 strand braid, the 'regular' slide up braid is perfect!
  • French twist: instead of a French or Dutch braid the French twist is a fun variation. Just keep in mind: in a French or Dutch braid, you'll first add in hair on the left side and then on the right. In a French twist you add in hair on the left and on the right before twisting further. A variation is the lace twist, where you only add in hair on one side.
Another time I'll explain the level 3 techniques, these are a little more advanced again. Good luck for now practicing these techniques!