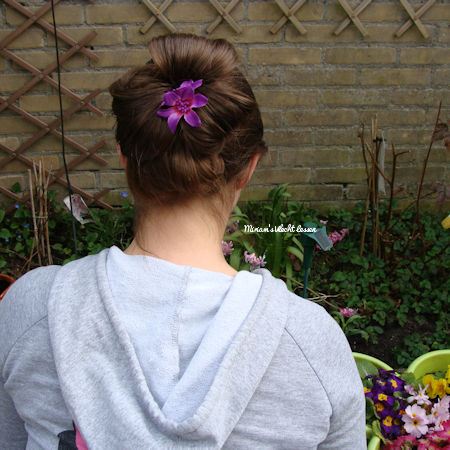
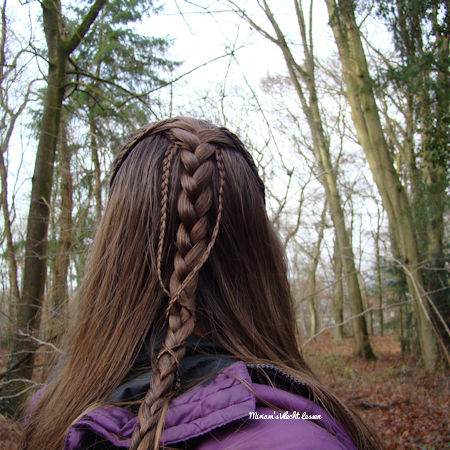
Posts tonen met het label bun. Alle posts tonen

dinsdag 31 maart 2020

4 strand French / Dutch braid

When you've mastered the 4 strand braid, you can try adding in hair. You'll get a French / Dutch braid, because you're adding in hair and crossing it over on one side (like a French braid) and under on the other side (like a Dutch braid).
There's also a way to do a full Dutch braided version, but I'll explain that in another article.

The technique:
4 strand French / Dutch braid tutorial


Ideas:

The 4 strand French / Dutch braid, as explained in my tutorial. The French braided section is on the left, the Dutch braided section on the right.


A variation, in which not all of the hair has been added. Great to combine with a bun.


The same variation as above, only pancaked. The braid has been finished as a fishtail.


In this variation the strand you don't add hair to (the third strand, counted from the side where you start braiding) has been turned into a rope braid before doing the 4 strand French / Dutch braid. Of course, instead of a rope braid you can also use loads of different braiding techniques...


maandag 16 maart 2020

3D split braid

A 3D split braid is a fun and easy variation on the regular 3 strand braid. Before you cross your strand over another, you split the strand in two and then you cross one section over and one section under the next strand. This creates an almost square looking braid.
Up for a challenge by adding in hair? Make sure to check out the video tutorial linked below. Important: always first split the strand and cross it over and under the next strand before adding in hair. This new hair gets added to the middle strand, which is the strand you've just split.

The technique:
3D split braid tutorial (with adding in hair)


Ideas:

The Dutch 3D split braid, as explained in my tutorial.


A variation on the Dutch 3D split braid: Dutch braid a small part, then create a ponytail and braid the hair from this ponytail. Then turn it into a bun.


The regular 3D split braid, started in a ponytail.


The first 3D split braid I've ever done myself, started without a ponytail, with a flower accent braid in Christmas colors.


A variation on the regular 3D split braid: two small 3D split braids, brought together at the back of the head.


zaterdag 14 december 2019

Box fishtail

A box fishtail is similair to a 3D split braid, only you're using a fishtail braiding technique instead of a regular braid. Divide the hair into two, take a small strand from one section, split this strand into two and cross one half over and one half under the section and add both halfs to the other sections. Keep repeating this to create your braid.
You can also add in hair for a hair Dutch version of this braid: then first do the splitting part (small strand, one half over, one half under, add both to the other section) and then add hair by crossing it under the section you took the strand from and adding it to the section you just added your halfs to as well.

The technique:
Box fishtail tutorial (By PrettyHairIsFun, starts at about 3.00)


Ideas:

A melting braid with a box fishtail - you can basically add a box fishtail to any ponytail or to an accent braid hairstyle!


A very messy version of the box fishtail - fun for an older girl!


A half up box fishtail


Another half up box fishtail, combined with a bun


The box fishtail as headband braid by adding in hair - check out the How to to learn how to do this exact hairstyle!

A slightly pancaked version of the box fishtail with hair added in


zondag 14 juli 2019

Chain link braid

This braid may seem complicated, but it's actually a combination of 2 twists (rope braids). Important is to remember how you're doing your twist as both twists need to be done the same way. Then you twist the two twists around each other. Keep your direction in mind here. If you've created your twists by twisting the strands to the right and then crossing the right strand over the left strand, then you first need to crosss your left twist over the right over. The other way around: if you've created your twists by twisting the strands to the left and then crossing the left strand over the right one, then now cross your right twists over the left one.
By twisting in the opposite way, your braid will start to look like a 'chain' - hence the name 'chain link braid'.

The technique:
Chain link braid tutorial (from CuteGirlsHairstyles)

Ideas:

A high ponytail with the chain link braid.


A side chain link braid.


A chain link braid also makes a cute accent braid.


The chain link braid was used here to create a bun by turning the braid around the elastic that created the starting ponytail and then pinning the braid into place.

A stacked braid made from a French braid and a chain link braid.


A fun variation: the chain link braid as accent braid with a Dutch braid, used together for a corset braid.


zaterdag 13 april 2019

Rope braid / twist

One of the easiest braids is the rope braid or twist: a two strand braid made by twisting the strands. Really quick and easy, but still different than a regular braid. So: perfect for when you want something different with your hair and don't have much time!

The technique:
Rope braid tutorial

Ideas:

The easiest way to do the rope braid / twist, is with all of the hair. For a looser hairstyle you can start without an elastic, if you want a tighter twist, then start from a ponytail.


Small rope braids make a cute accent braid, like with this 5 strand headband braid.


A rope braid can also be used to be turned into a bun!


Lucy's hairstyle from the movie Prince Caspian is also made from twists.


Do a twist on each side of the head and then pin them to the other side to create a crown braid. If you like, you can add braids as accents.


A twist can be used to pull another braid through. Here, four braids have been pulled through the twists.


Rope braids are also fun to create a heart with!


zaterdag 28 april 2018

How to: feathered 5 strand braid with French braids and bun


How to: feathered 5 strand braid with French braids and bun

Helpful tutorials:
5 strand Dutch braid tutorial
French braid tutorial
3 strand braid tutorial

You'll need:
Elastics
Bobby pins
Flower pins if desired

How to do this hairstyle?
  1. Divide the hair into three parts by parting the hair left off centre and right off centre.
  2. Put an elastic around the left and right part to keep it out of the way. You can now start braiding the middle part.
  3. Start a  5 strand Dutch braid with this and add hair once.
  4. Before adding hair for the second time, slice off a small section of hair. Do this on both sides.
  5. Repeat step 4 twice, so you have 3 loose strands. Of course you could do more, but make sure you have the same amount of loose strands on both sides. 
  6. Finish off the 5 strand Dutch braid at the neck and add an elastic.
  7. Now start a French braid on the left side. Use the loose strands from the left side of your 5 strand Dutch braid to add in. Finish off the braid near the neck with an elastic.
  8. Repeat step 7 on the right side.
  9. Now take all 3 braids together and put an elastic around them.
  10. Use the hair from the ponytail to create a 3 strand braid. Finish off with an elastic.
  11. Turn your braid into a bun and pin it into place with bobby pins. If you like, you can add some flower pins or other decorations.
Good luck!

Variation tips: instead of French braids you could also do Dutch braids and instead of a regular braid you could of course use another braiding technique for your bun.


zondag 28 januari 2018

How to: Simple and fancy bun


How to: Simple and fancy bun

Helpful tutorials:
3 strand braid tutorial
Twist (rope braid) tutorial

You'll need:
One big elastic
4 small elastics
Bobbypins
A flower or a bow if desired

How to do this hairstyle?
  1. Start off with a ponytail with all of the hair.
  2. Divide the hair into 4 parts: 2 parts with a little more hair and 2 parts with a little less hair.
  3. Use the 2 parts with a little more braid to create 2 regular braids. Finish off with a small elastic.
  4. Use the 2 parts with a little less hair to create 2 twist braids. Finish off with a small elastic.
  5. Twist the braids and twists around the big elastic and pin them into place with bobbypins. Try not to twist the braids and twists too tight around the elastic.
  6. If you like, you can give the bun a little color by using a flower clip or a small bow.
Good luck!

Tip: of course this bun can be done with all kinds of braiding techniques!

maandag 20 maart 2017

Topsy tail hairstyles

In my article Hair helping items from December 12, 2015 I already explained a few things on the topsy tail: a sort of stick with a circle on top of it that you can use to easily do a hair wrapped ponytail or a flipped ponytail. These kind of accents are always fun to give a hairstyle a little extra thing, but even with just a topsy tail you can already create a fun hairstyle!

The technique:
Hair wrapped ponytail tutorial (continues as Bubble braid)
Variation on the hair wrapped ponytail tutorial

Ideas:

The flipped ponytail, created by putting the topsy tail just behind the elastic and then putting the ponytail through the circle and pulling the topsy tail down. Tip: don't tighten the elastic until after you've done the flip!

A French braid into a hair wrapped ponytail, as explained at the beginning of my tutorial Bubble braid.

A bun created with a topsy tail - first do a ponytail and then divide the hair into three. Put your topsy tail from top to bottom first, then from the left to the right and then from the right to the left. Don't pull the hair tightly through the ponytail, but create loops, making the bun look like a shamrock.

This faux fishtail was created by putting an elastic around the hair, then flipped it with a topsy tail and then repeating these steps all the way down the hair.

This French flipped ponytail started with a small ponytail on top. After each flip you add hair and put a new elastic around the hair. The last part was done the same way as the faux fishtail above, only with more space in between the elastics.


maandag 30 januari 2017

3 strand braid

The 3 strand braid is the base of all braided hairstyles. The left strand over the middle one, the right strand over the middle one and repeat this until the end. Or - as alternative - the left strand under the middle one and the right strand under the middle one.
This is a technique you absolutely must master before trying other braiding techniques. And is this technique all you can manage to do? No worries, even with just a 3 strand braid you can create enough fun and beautiful hairstyles!

The technique:
3 strand braid tutorial


Ideas:


Bundled braids, which means: create a ponytail, do six 3 strand braids (or more or fewer) and fold them up!

A regular 3 strand braid with one of the strands being a small 3 strand braid.

A braided bun: create a ponytail, create three 3 strand braids in that ponytail and pin them into place with bobby pins.

A 3 strand braid with two micro 3 strand braids crossed around it.

Four crossed 3 strand braids, pulled through a twist (rope braid).

Create a knot out of two strands of hair and create a 3 strand braid in each strand. Use bobby pins to secure the knot. Here a fishtail has been done first.

Started as four 3 strand braids, crossed and combined into two. Below a bubble ponytail has been done.


vrijdag 20 januari 2017

Suspended infinity braid + zipper braid

The suspended infinity braid is a braid that's very similair to a zipper braid, a braid that looks like a zipper on a jacket or sweater. The difference between these two braids is that the suspended infinity braid is slightly easier and looks more like a Dutch braided braid, while the zipper braid is a little trickier to do and looks more like a French braided braid.
On my YouTube channel you can find a tutorial on the Suspended infinity braid, done as a lace braid - making it more of a half suspended infinity braid. You can find the link below under 'The technique'. I've also linked to a Suspended infinity braid and a Zipper braid tutorial that aren't from my own channel.

The technique:
Lace suspended infinity braid tutorial
Suspended infinity braid tutorial (from HairNailsInspiration)
Zipper braid tutorial (from YiyaYellow)

Ideas:


The lace suspended infinity braid, as explained in my tutorial.

A full suspended infinity braid

This braid looks like a suspended infinity braid, but has been done with the zipper braid technique. Combined with a fishtail braid.

Another zipper braid, now combined with a donut bun.

The zipper braid with a braided bun.

An advanced version: a zipper braid with two ribbons!


For questions about this technique: feel free to leave a comment below or write me a message on the Facebook page Miriam's Vlecht Lessen or on Instagram - @miriamtogether!


vrijdag 13 januari 2017

Flower braid

A braided flower in your hair can be created in hundreds of ways, but the technique is pretty much always the same: you do a braid, pancake one side and then bring the braid into the shape of a circle, making it look like a flower. The exception is the slide up flower braid - you don't pancake this braid, but you'll use the original braid to create a flower.
Below you can find a few ideas to use a braided flower in your hairstyle, but there's loads and loads of other ideas!

The technique:
Flower braid tutorial
Slide up flower braid tutorial

Ideas:


The flower braid as explained in my tutorial.

The slide up flower braid, as explained in my tutorial, combined with a French braid.

Another flower combined with a French braid, only now with a 'regular' flower braid.

Variation: try the flower braid with a 5 strand braid!

A waterfall braid finished off with a flower.

Fun as well: a flower braid with a ribbon braided into it!

Why only use part of the hair? Try the flower braid with all of the hair!