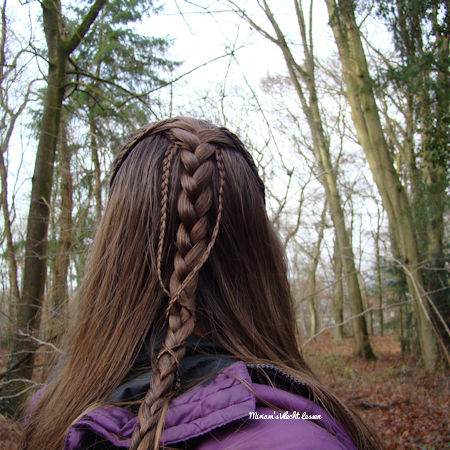
Posts tonen met het label twist. Alle posts tonen

dinsdag 31 maart 2020

4 strand French / Dutch braid

When you've mastered the 4 strand braid, you can try adding in hair. You'll get a French / Dutch braid, because you're adding in hair and crossing it over on one side (like a French braid) and under on the other side (like a Dutch braid).
There's also a way to do a full Dutch braided version, but I'll explain that in another article.

The technique:
4 strand French / Dutch braid tutorial


Ideas:

The 4 strand French / Dutch braid, as explained in my tutorial. The French braided section is on the left, the Dutch braided section on the right.


A variation, in which not all of the hair has been added. Great to combine with a bun.


The same variation as above, only pancaked. The braid has been finished as a fishtail.


In this variation the strand you don't add hair to (the third strand, counted from the side where you start braiding) has been turned into a rope braid before doing the 4 strand French / Dutch braid. Of course, instead of a rope braid you can also use loads of different braiding techniques...


zondag 14 juli 2019

Chain link braid

This braid may seem complicated, but it's actually a combination of 2 twists (rope braids). Important is to remember how you're doing your twist as both twists need to be done the same way. Then you twist the two twists around each other. Keep your direction in mind here. If you've created your twists by twisting the strands to the right and then crossing the right strand over the left strand, then you first need to crosss your left twist over the right over. The other way around: if you've created your twists by twisting the strands to the left and then crossing the left strand over the right one, then now cross your right twists over the left one.
By twisting in the opposite way, your braid will start to look like a 'chain' - hence the name 'chain link braid'.

The technique:
Chain link braid tutorial (from CuteGirlsHairstyles)

Ideas:

A high ponytail with the chain link braid.


A side chain link braid.


A chain link braid also makes a cute accent braid.


The chain link braid was used here to create a bun by turning the braid around the elastic that created the starting ponytail and then pinning the braid into place.

A stacked braid made from a French braid and a chain link braid.


A fun variation: the chain link braid as accent braid with a Dutch braid, used together for a corset braid.


zaterdag 13 april 2019

Rope braid / twist

One of the easiest braids is the rope braid or twist: a two strand braid made by twisting the strands. Really quick and easy, but still different than a regular braid. So: perfect for when you want something different with your hair and don't have much time!

The technique:
Rope braid tutorial

Ideas:

The easiest way to do the rope braid / twist, is with all of the hair. For a looser hairstyle you can start without an elastic, if you want a tighter twist, then start from a ponytail.


Small rope braids make a cute accent braid, like with this 5 strand headband braid.


A rope braid can also be used to be turned into a bun!


Lucy's hairstyle from the movie Prince Caspian is also made from twists.


Do a twist on each side of the head and then pin them to the other side to create a crown braid. If you like, you can add braids as accents.


A twist can be used to pull another braid through. Here, four braids have been pulled through the twists.


Rope braids are also fun to create a heart with!


zaterdag 2 juni 2018

30 days new braids

June is always a special month on Instagram for the braiding community - it's the 30 days new braids month!

30 days new braids is a challenge for braiders to try and do as many different braiding techniques as possible. Each day of the month June is about a certain braiding technique. It's up to you to create a hairstyle using this technique. Of course there's loads of possibilities, because with a technique as (for example) French braiding, you can do a thousand different hairstyles.

The challenge is not so much about trying to join in every day, but about challenging yourself to try new braiding techniques. The challenge of course has the standard French and Dutch braid, but also techniques like space buns, crown braids, feathered braids and heart braids. The idea behind the challenge is to get you out of your comfort zone: as you braid more often, you often also find yourself doing the same kind of braid. 30 days new braids tries to show you there's so many more techniques than the ones you already do so often.

If you'd like to know more about the 30 days new braids challenge: Jenni Petänen is hosting the challenge this year on Instagram. She has taken over the challenge from Hair by Lori, who has loads of information and ideas on her website.

If you want to see my styles for this year's 30 days new braids challenge, then please head over to my Instagram account. The collage below is from two years ago, when I joined in every day.


zaterdag 24 maart 2018

Headband braids inspiration

Headband braids are great hairstyles on school mornings as they are quick and often easy - a French braid, a Dutch braid or a lace braid. A twist braided headband is also a great idea and for those of you with longer hair, a simple 3 strand braid wrapped around the head (photo below) is perfect as well.

But why not try using a different technique for your headband braids? I have a tutorial on the 5 strand headband braid and you could also use ribbons in your headband braid. A little while I tried out a completely different technique - a 4 strand fishtail headband braid. I really love how this headband braid turned out as it's so different from any other headband braid and it doesn't even take that long (once you've mastered the 4 strand fishtail of course). If you'd like to practice the 4 strand fishtail braid first of all, there's a tutorial on my YouTube channel Miriam's Vlecht Lessen.

Simple 3 strand headband braid for longer hair


4 strand fishtail headband braid


Good luck trying out different techniques! I'd love to know which techniques you've tried - please leave a comment below telling me which technique you've used!


zondag 28 januari 2018

How to: Simple and fancy bun


How to: Simple and fancy bun

Helpful tutorials:
3 strand braid tutorial
Twist (rope braid) tutorial

You'll need:
One big elastic
4 small elastics
Bobbypins
A flower or a bow if desired

How to do this hairstyle?
  1. Start off with a ponytail with all of the hair.
  2. Divide the hair into 4 parts: 2 parts with a little more hair and 2 parts with a little less hair.
  3. Use the 2 parts with a little more braid to create 2 regular braids. Finish off with a small elastic.
  4. Use the 2 parts with a little less hair to create 2 twist braids. Finish off with a small elastic.
  5. Twist the braids and twists around the big elastic and pin them into place with bobbypins. Try not to twist the braids and twists too tight around the elastic.
  6. If you like, you can give the bun a little color by using a flower clip or a small bow.
Good luck!

Tip: of course this bun can be done with all kinds of braiding techniques!

vrijdag 10 februari 2017

Heart braid

Around Valentine's Day heart braids are always populair, especially for younger girls. There's different way to create a heart braid in the hair for which you can of course use different techniques. On my YouTube channel Miriam's Vlecht Lessen you can find two tutorials on heart braids and below you can find some more ideas.

The technique:
Heart braid with ribbon tutorial
Heart braid from fishtails tutorial

Ideas:


Loop a braid around another braid and you've already got a heart!

A fun accent heart, done as explained in my tutorial, only done with twists instead of with fishtails.

If you look closely, you can see how this heart was created with elastics and braids!

This heart was created with ribbon braids, but also done the same way as explained in my tutorial!

You can find the instructions for this heart braid under 'How to' here on the blog!


maandag 30 januari 2017

3 strand braid

The 3 strand braid is the base of all braided hairstyles. The left strand over the middle one, the right strand over the middle one and repeat this until the end. Or - as alternative - the left strand under the middle one and the right strand under the middle one.
This is a technique you absolutely must master before trying other braiding techniques. And is this technique all you can manage to do? No worries, even with just a 3 strand braid you can create enough fun and beautiful hairstyles!

The technique:
3 strand braid tutorial


Ideas:


Bundled braids, which means: create a ponytail, do six 3 strand braids (or more or fewer) and fold them up!

A regular 3 strand braid with one of the strands being a small 3 strand braid.

A braided bun: create a ponytail, create three 3 strand braids in that ponytail and pin them into place with bobby pins.

A 3 strand braid with two micro 3 strand braids crossed around it.

Four crossed 3 strand braids, pulled through a twist (rope braid).

Create a knot out of two strands of hair and create a 3 strand braid in each strand. Use bobby pins to secure the knot. Here a fishtail has been done first.

Started as four 3 strand braids, crossed and combined into two. Below a bubble ponytail has been done.


zondag 20 november 2016

4 strand braid

Had enough of the regular 3 strand braid? Then it's really easy to add a fourth strand. The most important thing to remember is: over - under; under - over. If you keep repeating this, the 4 strand braid will be no problem at all!

The technique:
4 strand braid tutorial

Ideas:


Instead of starting the braid from loose hair you can of course start with a ponytail as well. Here the 4 strand braid has been combined with a 5 strand headband braid.


Why only do one 4 strand braid? A ponytail with two 4 strand braids is beautiful too!

Combine the 4 strand braid with some smaller braids. These twists/rope braids for example! More on this style? Check out 'How to'!

The 4 strand braid can of course be done on the side as well. Here the braid has been combined with a 5 strand slide up braid.

So fun: two 4 strand braids starting from the sides and forming some sort of headband across the back of the head. Here they've been combined with a faux fishtail braid.


maandag 29 augustus 2016

Vakantiekapsels VI // Vacation hairstyles VI

Vakantiekapsels VI

Dit zijn de laatste foto's van mijn vakantiekapsels. Bij elke foto staat vermeld waar de foto gemaakt is, dit staat onderstreept. De dik gedrukte tekst legt uit hoe het kapsel gemaakt is. Daarbij staat vaak een link naar een YouTube filmpje met meer uitleg. Wil je nog meer weten over hoe het kapsel gemaakt is (of heb je een andere vraag)? Laat dan even een reactie achter!

Vacation hairstyles VI

These are the last photos of my vacation hairstyles. Each photo has listed below where it was taken, this is underlined. The words in italic will explain how the style was done. It often includes a YouTube link to make it easier. If you'd like to know more about the hairstyle (or if you have another question), then feel free to leave a reaction!

17 mile drive - the Lone Cypress
In plaats van een Ingevlochten 3D splitvlecht heb ik een vissengraat gedaan. De techniek werkt hetzelfde als bij de ingevlochten 3D splitvlecht: je splitst eerst het plukje dat je aan de andere pluk toevoegt en dan voeg je onderlangs haar toe.
Instead of a Dutch 3D split braid I did a fishtail braid. The technique is the same as for the Dutch 3D split braid: you'll first split the small strand you're adding to the other strand and then you're adding in new hair by crossing it under.


Buelton
Een simpele Ingevlochten twist!
A simple French twist!

Capitol Reef / Los Angeles
Links een gewone vissengraat, rechts een Ingevlochten vissengraat!
On the left a regular fishtail braid, on the right a French fishtail!


vrijdag 12 augustus 2016

Vacation hairstyles I

The past few weeks I've been on vacation: I went on a beautiful road trip through the west of the United States. Of course I took a lot of hair photos! Below you can find some of those hairstyles. Each photo has listed below where it was taken, this is underlined. The words in italic will explain how the style was done. It often includes a YouTube link to make it easier. If you'd like to know more about the hairstyle (or if you have another question), then feel free to leave a reaction!


Downtown Disney, Anaheim
Part the hair down the middle or just off centre. Do a Dutch braid on both sides of the part (YouTube tutorial). Add hair until you've reached the ear and then continue to braid until the braid reaches the middle of the head. Put an elastic around the braids together and if you like, finish off with a bow or a flower.


Palm Springs, Aerial Tramway
Part just off centre and do a lace braid at the front and another one at the back (the beginning of this style is the same as can be seen in this tutorial). Finish off both braids with a temporary elastic and then do a 5 strand intricate braid with 2 microbraids.


Palm Springs
Part just off centre and do two small ponytails. Divide the top ponytail into 3 strands and the bottom one into 2 strands. Pull the 2 strands in between the 3 strands. The 3 strands are now at the bottom. Add some hair to this and create a new ponytail with this. Keep repeating this pattern until you've adding in most of the hair and then finish off the style with a messy bun.


Joshua Tree National Park
3 strand pull through braid - read the instructions below the photo above to recreate this style.


Scottsdale
Part just off centre and do a Knotted bracelet braid. Then create a ponytail with all of the hair and turn this into a bun. If you like, finish off the style with a flower or a bow.


Scottsdale
Part just off centre and do a lace twist (lace braid tutorial and twist tutorial). Add hair until the ear and then twist on until you've reached the back of the head about halfway. Pin the twist into place with bobby pins and finish off with a flower or a bow if desired.


zondag 3 juli 2016

How to: Double waterfall braid with waterfall twists


Helpful tutorials:
Waterfall braid
Waterfall twist
Twist
3 strand braid

You'll need:
Three temporary elastics
One small elastic

How to do this hairstyle?
  1. Comb all of the hair back. If you'd like a very tight and neat hairstyle, then do a part left and right off centre, but this is optional.
  2. Take a small strand of hair in the middle and divide this into three strand.
  3. Now start a waterfall braid, but pay attention: this is a double waterfall braid! This means you'll be dropping strands and both the right and the left and replacing them with new strands of hair. Make sure to drop the same number of strands on both sides (the hairstyle in the photo has 6 dropped strands on each side).
  4. When you've reached about the middle of the head, braid down a little further. Finish off with a temporary elastic.
  5. Now take a small strand of hair above the right ear and divide it into two. Start a waterfall twist with this. The strand you're using as waterfall strands are the strands you've dropped on the right side of your waterfall braid.
  6. When you've used all of the waterfall strands for your waterfall twist, then twist a little further down and finish off with a temporary elastic.
  7. Now repeat step 5 and 6 on the left side.
  8. Now take the hair from the two waterfall twists and from the waterfall strand in the middle. Remove the temporary elastics and use the three strands of hair for a regular 3 strand braid. Finish off with a small elastic.
  9. If you like, you can add some curls. The curls in the photo were done by tightly French braiding the hair a day earlier and then sleeping with it overnight.
Good luck!


zondag 12 juni 2016

Donut knotjes II // Donut buns II

Donut knotjes II

Al eerder schreef ik een artikel over donut knotjes: knotjes gemaakt met behulp van een donut, een groot elastiek met een gat in het midden. Deze donut schuif je over een staart, het haar gaat eroverheen en dan een gewoon elastiek eromheen om de knot te maken.

In mijn eerdere artikel schreef ik over het afmaken van de knot: het haar eromheen wikkelen en vastzetten of nog een leuke vlecht eerst maken. Maar waarom zou je niet eens wat met het haar doen voor je de knot gaat maken?

De techniek voor deze andere knot wordt een Gevlochten knot genoemd (in het Engels braided bun). Je begint nog steeds met een staart en schuift de donut hier overheen. Nu pak je echter een klein plukje haar van de staart, niet al het haar. Begin met dit kleine plukje een vlecht. Vlecht door tot je vlechtje lang genoeg is om over de donut heen te brengen. Doe er dan geen elastiekje omheen, maar leg het vlechtje over de donut en trek het uiteinde aan de binnenkant van de donut omhoog. Als het goed is, is het haar dan weer bij de staart. Voeg wat haar toe aan je plukje en begin een nieuw vlechtje.
Herhaal dit net zo lang tot je al het haar hebt toegevoegd. Maak dan de vlecht helemaal af tot het einde van het haar en doe er een elastiekje omheen. Haal de vlecht net zo vaak om de donut heen tot de hele vlecht 'op' is. Zet dan vast met een paar schuifspeldjes.

Deze gevlochten knot leg ik overigens met meer details uit in mijn boek Miriam's Vlecht Lessen. Dit boek kun je bestellen via bol.com.

Wil je eens een andere Gevlochten knot? Probeer dan de techniek eens met twists in plaats van met vlechten! Dit kost wel meer tijd, maar heeft ook een supermooi resultaat!

Gevlochten knot
Braided bun

Gevlochten knot met twists
Braided bun with twists

Donut buns II

In an earlier article I already wrote about donut buns: buns made with the help of a donut, a big elastic with a hole in the middle. You'll put this donut around a ponytail, let the hair fall over it and then put a normal elastic around it to make the bun.

In my earlier article I wrote about finishing the bun: wrapping the hair around it and pinning it down or doing a fun braid first. But why not do something with the hair before creating the bun?

The technique for this other bun is called a Braided bun. You'll still start with a ponytail and you'll put the donut over this. Now take a small strand of hair, not all of the hair. Do a braid with this small strand. Braid until the braid is long enough to put over the donut. Don't put an elastic around it, but place the braid over the donut and pull the end through the middle of the donut. You should have the end with the rest of the hair again now. Add some hair to your strand and start a new braid.
Keep repeating this until you've added in all of the hair. Then finish the braid until the end of the hair and put an elastic around it. Now pull the braid around the donut until you run out of braid. Then pin the ends down with a couple of bobby pins.

If you'd like to try a different Braided bun, then you could try the technique with twists instead of with braids! This will take more time, but the result is definitely worth it!