Posts tonen met het label technique. Alle posts tonen

dinsdag 7 april 2020

4 strand Dutch braid

A 'normal' 4 strand braid with hair added in is a French / Dutch braid. But there's also a technique to do a completely Dutch version of this braid. To do so, you have to add in the hair to the strand you cross over when it crosses under. This means it's important to master the regular 4 strand braid first and I would also advise to practice the French/Dutch version before trying this braid.

The technique:
4 strand Dutch braid tutorial


Ideas:


The 4 strand Dutch braid, as explained in my tutorial.


A simple variation: a diagonal 4 strand Dutch braid.


The same diagonal 4 strand Dutch as the photo above, only now a looser version for a more relaxed look


Instead of braiding until the end of the hair you can also finish off the style with a messy bun.


Also a fun variation: the 4 strand Dutch braid as headband braid.


maandag 16 maart 2020

3D split braid

A 3D split braid is a fun and easy variation on the regular 3 strand braid. Before you cross your strand over another, you split the strand in two and then you cross one section over and one section under the next strand. This creates an almost square looking braid.
Up for a challenge by adding in hair? Make sure to check out the video tutorial linked below. Important: always first split the strand and cross it over and under the next strand before adding in hair. This new hair gets added to the middle strand, which is the strand you've just split.

The technique:
3D split braid tutorial (with adding in hair)


Ideas:

The Dutch 3D split braid, as explained in my tutorial.


A variation on the Dutch 3D split braid: Dutch braid a small part, then create a ponytail and braid the hair from this ponytail. Then turn it into a bun.


The regular 3D split braid, started in a ponytail.


The first 3D split braid I've ever done myself, started without a ponytail, with a flower accent braid in Christmas colors.


A variation on the regular 3D split braid: two small 3D split braids, brought together at the back of the head.


zaterdag 14 december 2019

Box fishtail

A box fishtail is similair to a 3D split braid, only you're using a fishtail braiding technique instead of a regular braid. Divide the hair into two, take a small strand from one section, split this strand into two and cross one half over and one half under the section and add both halfs to the other sections. Keep repeating this to create your braid.
You can also add in hair for a hair Dutch version of this braid: then first do the splitting part (small strand, one half over, one half under, add both to the other section) and then add hair by crossing it under the section you took the strand from and adding it to the section you just added your halfs to as well.

The technique:
Box fishtail tutorial (By PrettyHairIsFun, starts at about 3.00)


Ideas:

A melting braid with a box fishtail - you can basically add a box fishtail to any ponytail or to an accent braid hairstyle!


A very messy version of the box fishtail - fun for an older girl!


A half up box fishtail


Another half up box fishtail, combined with a bun


The box fishtail as headband braid by adding in hair - check out the How to to learn how to do this exact hairstyle!

A slightly pancaked version of the box fishtail with hair added in


zondag 14 juli 2019

Chain link braid

This braid may seem complicated, but it's actually a combination of 2 twists (rope braids). Important is to remember how you're doing your twist as both twists need to be done the same way. Then you twist the two twists around each other. Keep your direction in mind here. If you've created your twists by twisting the strands to the right and then crossing the right strand over the left strand, then you first need to crosss your left twist over the right over. The other way around: if you've created your twists by twisting the strands to the left and then crossing the left strand over the right one, then now cross your right twists over the left one.
By twisting in the opposite way, your braid will start to look like a 'chain' - hence the name 'chain link braid'.

The technique:
Chain link braid tutorial (from CuteGirlsHairstyles)

Ideas:

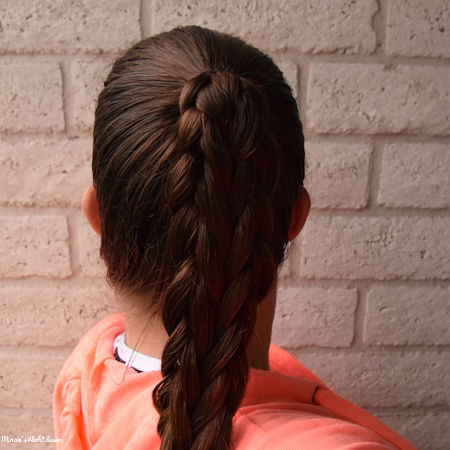
A high ponytail with the chain link braid.


A side chain link braid.


A chain link braid also makes a cute accent braid.


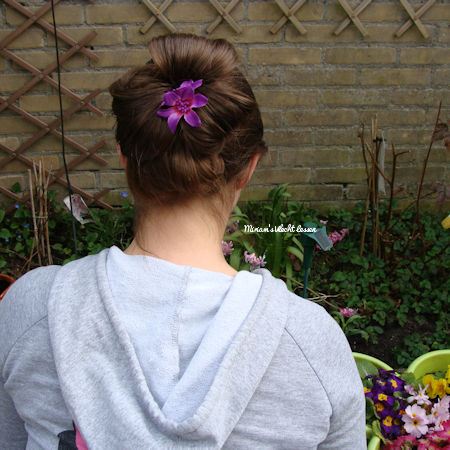
The chain link braid was used here to create a bun by turning the braid around the elastic that created the starting ponytail and then pinning the braid into place.

A stacked braid made from a French braid and a chain link braid.


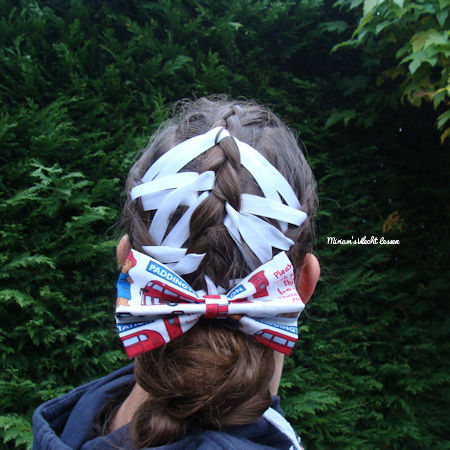
A fun variation: the chain link braid as accent braid with a Dutch braid, used together for a corset braid.


zondag 26 mei 2019

5 strand split braid

The regular 3D split braid is a super easy variation on the 3 strand braid. The 5 strand version isn't that much more difficult, it's mostly a matter of knowing how to do the technique.
You start by dividing the hair into 5 strands, I'm calling them (from the left to the right) A, B, C, D, E. Split strand A (the far left strand) into two and cross one section over strand B and one section under strand B. Then add your two sections together and cross them together over strand C. Then split strand E into two and cross one section over strand D and one section under strand D. Then add your two sections together and cross them over the middle strand. Keep repeating this.
In short: the outer strand always goes over and under and then over.
You can also add in hair, so you get a Dutch braided version of the braid. Pay attention, though: always split the outer strand first and cross it over and under. Then add hair to the strand you've just split and now brought together again. Using the letters from before: split strand A, cross the sections over and under strand B, grab new hair, cross it under strand B and add it to strand A. Then cross strand A, with the new hair, over strand C.

The technique:
5 strand split braid tutorial (From Flettemamma - English subtitles)

Ideas:


A high ponytail with the 5 strand split braid


A corset braid combined with a 5 strand split braid


Dutch 3D split braid continuing into a 5 strand split braid


The Dutch version of the 5 strand split braid


A Dutch version with half of the hair


A headband braid version of the Dutch 5 strand split braid, combined with a Dutch fishtail


zaterdag 2 juni 2018

30 days new braids

June is always a special month on Instagram for the braiding community - it's the 30 days new braids month!

30 days new braids is a challenge for braiders to try and do as many different braiding techniques as possible. Each day of the month June is about a certain braiding technique. It's up to you to create a hairstyle using this technique. Of course there's loads of possibilities, because with a technique as (for example) French braiding, you can do a thousand different hairstyles.

The challenge is not so much about trying to join in every day, but about challenging yourself to try new braiding techniques. The challenge of course has the standard French and Dutch braid, but also techniques like space buns, crown braids, feathered braids and heart braids. The idea behind the challenge is to get you out of your comfort zone: as you braid more often, you often also find yourself doing the same kind of braid. 30 days new braids tries to show you there's so many more techniques than the ones you already do so often.

If you'd like to know more about the 30 days new braids challenge: Jenni Petänen is hosting the challenge this year on Instagram. She has taken over the challenge from Hair by Lori, who has loads of information and ideas on her website.

If you want to see my styles for this year's 30 days new braids challenge, then please head over to my Instagram account. The collage below is from two years ago, when I joined in every day.


donderdag 22 juni 2017

5 strand braid

One of my favorite braids is the one with 5 strands. There's two techniques for this braid: the technique explained in the tutorial (left over-under, right over-under or left under-over, right under-over) and the technique that's mostly used for the 5 strand braid with ribbon. Both are great braids and after a little practice you'll see how easy this braid is. Having trouble holding all 5 strands at the same time? Then really use the tips I'm giving at the beginning of the tutorial, these really help!

The technique:
5 strand braid tutorial

Ideas:


A ponytail with a loose 5 strand braid, as explained in my tutorial

A 5 strand side braid, combined with a 5 strand headband braid

The 5 strand braid also makes a great bubble braid!

Replace 2 strands by ribbon, braid the usual 5 strand braid technique and this is the result!

For when you have more time: a 5 strand braid made out of small braids!

For this 5 strand braid with microbraids you have to use the 5 strand ribbon braid technique. Or just watch my tutorial on this braid!


maandag 10 april 2017

4 strand waterfall braid

When you've mastered the regular waterfall braid and when you've leaned the 4 strand braid, then this 4 strand waterfall braid is easy for you. It's a super fun braid, that's easy and beautiful. Tip: make sure you're always going under on the side closest to the part line, this gives the best result.

The technique:
4 strand waterfall braid tutorial

Ideas:


A 4 strand waterfall braid on the right side, combined with a French braid on the left side.

Two 4 strand waterfall braids

Again two 4 strand waterfall braids, finished off with a bubble braid

A double 4 strand waterfall braid

A 4 strand waterfall braid, combined with a braid that's a combination of a regular braid and a fishtail braid

Two 4 strand waterfall braids, finished off as a flower, with a mermaid braid below.


maandag 27 maart 2017

Corset braid

A corset braid means a combination of (usually) Dutch braids and a ribbon. The ends of the ribbon are being used to go through the braid, alternating the left and right side, creating a sort of criss cross pattern. This can be done with a single ribbon or with two (or even more!).
I don't have a tutorial myself on the corset braid, but you can find a good tutorial on YouTube by Braidsandstyles12.

The technique:
Dutch braid tutorial

Ideas:


A corset braid, ending in a ponytail

A double corset braid, created by starting with 3 Dutch braids - left, middle and right

A corset braid with two ribbons. You'll get the best pattern by skipping 1 braided sittch per color every time, giving you nice, regular crosses.

You can also bring both braids through the same piece, giving you a kind of 'shadow' effect

A tight corset braid, that started with two 4 strand ribbon braids.


maandag 20 maart 2017

Topsy tail hairstyles

In my article Hair helping items from December 12, 2015 I already explained a few things on the topsy tail: a sort of stick with a circle on top of it that you can use to easily do a hair wrapped ponytail or a flipped ponytail. These kind of accents are always fun to give a hairstyle a little extra thing, but even with just a topsy tail you can already create a fun hairstyle!

The technique:
Hair wrapped ponytail tutorial (continues as Bubble braid)
Variation on the hair wrapped ponytail tutorial

Ideas:

The flipped ponytail, created by putting the topsy tail just behind the elastic and then putting the ponytail through the circle and pulling the topsy tail down. Tip: don't tighten the elastic until after you've done the flip!

A French braid into a hair wrapped ponytail, as explained at the beginning of my tutorial Bubble braid.

A bun created with a topsy tail - first do a ponytail and then divide the hair into three. Put your topsy tail from top to bottom first, then from the left to the right and then from the right to the left. Don't pull the hair tightly through the ponytail, but create loops, making the bun look like a shamrock.

This faux fishtail was created by putting an elastic around the hair, then flipped it with a topsy tail and then repeating these steps all the way down the hair.

This French flipped ponytail started with a small ponytail on top. After each flip you add hair and put a new elastic around the hair. The last part was done the same way as the faux fishtail above, only with more space in between the elastics.