Posts tonen met het label 3d round braid. Alle posts tonen

zaterdag 11 januari 2020

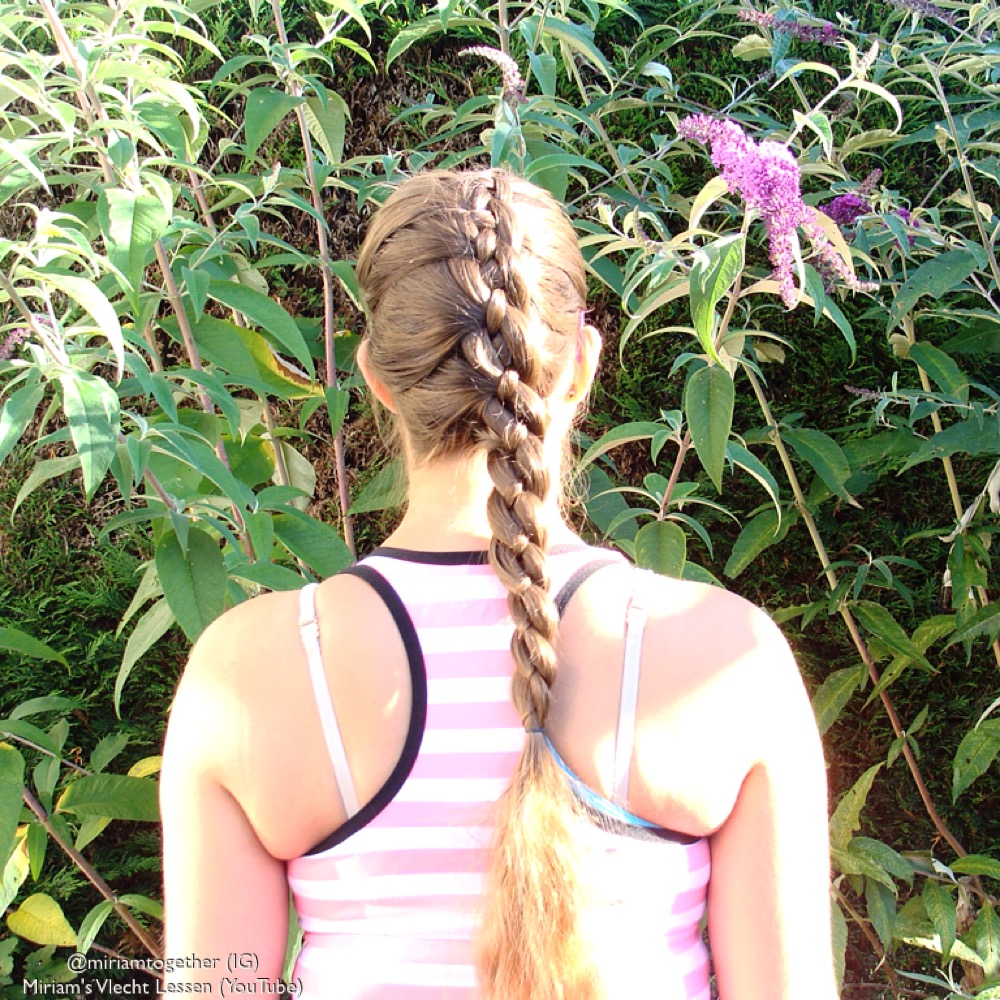
How to: Dutch 3D round braid with 4 strand woven braid

Helpful tutorials:
Dutch 3D round braid

You'll need:
1 elastic
1 ribbon
1 small elastic
Topsy tail (if you wish to hide the elastic with hair - an alternative is to use a flower clip or bow)

How to do this hairstyle?
  1. Attach the ribbon to the big elastic.
  2. Part the hair off centre.
  3. Take a small section of hair on the side with the most hair and divide this into four equal parts.
  4. Start a Dutch 3D round braid with these four strands. Angel your braid towards the ear.
  5. Continue until you've added in all of the hair. Finish on the side of the head.
  6. Use your elastic with the ribbon attached to it to finish off your Dutch 3D round braid.
  7. Take your topsy tail and put it point down through the elastic. Take a small strand of hair, wrap it around the elastic and then put the end of the strand through the opening of the topsy tail. Pull the topsy tail down. You've now done a hair wrapped ponytail, your elastic is hidden. You could also choose to hide your elastic with a flower clip or a bow. If you want to do that, skip this step and add the flower clip or bow once you've finished braiding.
  8. Divide the hair from your ponytail into three equal strands. The ribbon is your fourth strands. The start position of the ribbon doesn't matter for the braid.
  9. Now do a 4 strand woven braid: take the far left strand and cross it over the strand next to it, under the next strand and over the last strand (where 'strand' is written, you can also read 'ribbon').
  10. Repeat step 9 all the way down the hair. Finish off with a small elastic.
Good luck!

zondag 14 januari 2018

Inspiration idea: stacked braid variation

On my YouTube channel Miriam's Vlecht Lessen you can find a tutorial on the stacked braid. In this tutorial I'm using the Dutch braid and rope twist as braids for the stacked braid, but of course there's a lot of other possibilities. Almost every technique is suitable for the stacked braid. For the bottom braid I'd suggest choosing braids you can easily pancake (such as Dutch braids or pull through braids), while the top braid should be a smaller braid (like a fishtail braid or a regular 3 strand braid).

For this variation I've used a Dutch braid as bottom braid and a round 3D braid as top braid. Have you got fun variation tips? Then let them know in a comment below!


maandag 3 oktober 2016

Animal day

Tomorrow it's World Animal Day, a day to give some extra attention to animals. That's why today's post has some photos of hairstyles with animals included!

Happy Animal Day tomorrow!

Hairstyle: round 3D braid into a woven fishtail, animals: crocodiles in Gambia


Hairstyle: French braid into a 4 strand braid with microbraid, animal: rhino in Senegal


Hairstyle: French braids brought together, animals: my rabbits Snoepy (the white one) and Fleur


Hairstyle: waterfall twist with ribbon, animal: my rabbit Fleur


vrijdag 23 september 2016

Headband braid

A headband braid is basically a braid that's done near the front of the head. You can use any braiding technique you like to do a headband braid - from French to Dutch braid, from rope braid to 3D round braid to 5 strand braid... If you know a braiding technique, you can do a headband braid with it!

The technique:
Headband braid tutorial I (Round 3D braid technique)
Headband braid tutorial II (5 strand Dutch braid technique)
Headband braid tutorial III (Ladder braid technique)

Ideas:


Round 3D headband braid as explained in Headband braid tutorial I.

5 strand Dutch braid as headband braid as explained in Headband braid tutorial II. Added to it is a Dutch waterfall braid.

Ladder headband braid as explained in Headband braid tutorial III.

4 strand Dutch braid as headband braid.

Double Dutch braid as headband braid.

French fishtail headband braid with a slide up braid.


dinsdag 13 oktober 2015

Basic techniques - level 3

Those who have mastered the level 1 and level 2 basic techniques, can try even more difficult braiding techniques. In this article I'll explain the next step: the level 3 basic techniques.

  • Dutch waterfall braid: a variation on the waterfall braid. Instead of crossing the strands over, like in a French braid, you'll cross the strands under. The only thing you need to keep in mind, is that you have to drop the middle strand every time and put the replacing strand in the middle before braiding further.
  • 5 strand braid: one of my favorite braids. Braiding with 5 strands might seem difficult, but the advantage is that you can hold your two left strands and your two right strands together. This makes it seem like you only have three strands. You're also working with only three strands every time: your far left strands is going over-under (or under-over) and then your far right strand is going over-under (or under-over). One strand doesn't cross all other four strands.
  • French/Dutch 4 strand braid: if you've mastered the regular 4 strand braid, you can try adding in hair. Because the 4 strand braid is going over-under, under-over (or under-over, over-under), you'll have half a French braid and half a Dutch braid.
  • 4 strand ribbon braid: instead of braiding with 4 strands of hair, you're braiding with 3 strands of hair and one ribbon. Personally I think this braid is easier than the regular 4 strand braid, because the ribbon makes it easier to tell the strands apart and to see where you are in your braiding process.
  • Round 3D braid: divide the hair into 4 strands. Cross the far left strand under two strands and twist it around the last strand. Then cross the far right strand under two strands and twist it around the last strand. Keep repeating this and you'll get a beautiful round braid.
  • Mermaid braid: a mermaid braid is like a regular French braid, only now you take strands to add in from the far front / side. Watch the tutorial for more details!
Good luck again practicing these techniques! If you've mastered all of these as well, you can start preparing for the final level of basic braiding techniques. I'll explain these in another article.

woensdag 7 oktober 2015

3D headband braid

Headband braids (braids done close to the forehead) are always fun. They're good to keep the hair out of your face and they're always great to combine with other braids.

Like with almost all other braids you have a lot of options with headband braids. You could do a French braided headband braid, a Dutch braided headband braid (where you cross the strands under), a lace braided headband braid (where you only add in hair on one side), a twisted headband braid, a headband braid with 5 strands... or a 3D headband braid.

For the headband braid in the photo I've used the 3D round braid technique. For this braid you'll start with 4 strands. To make it easy, I'll call them (from the left to the right) A-B-C-D. First cross strand A under strand B and C and then twist it around strand C. Then cross strand D under strand C and B and then twist it around strand B. Now add some hair to strand A, cross the strand under B and C and twist it around C. Then add some hair to strand D, cross it under strand C and B and then twist it around B. Keep repeating this.

Good luck! Do you want to share photos of your 3D headband braid? Then post them on Instagram with #mvlhair or on the Facebook page of Miriam's Vlecht Lessen!